
In no way do I claim to have a green thumb. But, I have learned a ton in my one whole year of gardening experience (impressive, right ? :).
My husband and I joke that we live on a farm. We really just live in a 100 year old farm house on some land that is shared with our landlords, who live behind us. When choosing a house to rent, we knew we wanted some space to begin gardening, but we totally were blessed with a lot more. We actually have two apple trees, about 1/2 an acre to garden on, a grape vine, two walnut trees, and a huge deck for raised beds and planters. Which brings us to today's post: Growing Your Own Food Part 1 - porch/ deck gardening. I want to share with you all what I have learned, and also learn from you too (if you have tips feel free to comment!).
I think that it is so important to try and eat food as close to the source as possible- for nutrient density of your food. What closer than your own back yard or porch, right? The easiest first step to make is gardening in planters or raised beds. Raised beds need a bit of construction, however. So today, I will show you some of my "planters" and where you can make/ get your own.
First, I recommend some resources to help you get started:
Internet resources:
- Sites like this one from Farmer's Almanac that will let you know the best planting dates for your area. Just type in your city and state and it will tell you when to plant :)
- Or this site, Sustainable Table, that you can search around in for all kinds of info on what is in season when, finding a farmers market near you (talking to veteran growers at the farmers markets is where we find a TON of tips and info), etc.
- And EHow is a great site to search for "how to plant ______" (just about anything you can think of planting
- Finally, Local Harvest is a great place to buy plants and seed from. They will also connect you with local produce growers who have already grown up something from seed and all you have to do is take it home and plant it in a planter with some dirt! We actually got a lot of our lettuces and Swiss Chard from a guy down the street we found on Local Harvest!
- Herbs- whether you plant sage, parsley, rosemary, thyme, basil, mint, or cilantro (there are many more- these are just the most used I can think of), herbs are the easiest to get started with. Herbs are very robust- especially basil and mint- and can come back every year! Just simply trim them back in the fall when they are done and they will begin again the next spring/ early Summer (depending on what climate you live in). Think about this for your budget. Buying one of those organic herbs at a grocery store can be $3-$6 a time, and you may not use it all before it goes to waste and then in a couple weeks you buy more! If you planted one basil plant that usually costs $3-$5 at a local farmers market, it can last you for years! And you can just clip what you need as you need it so no need to feel bad about any waste :) Herbs will grow as big as their planter. So if you only want to tend a small amount of rosemary, for example- put it in a 4"-6" planter (only about $1 at Walmart- see below). But other herbs will grow into huge bushes- like basil and mint- and if you want to get your moneys worth, you can plant in a foot wide or bigger planter.


 in the blue planter: Spearmint
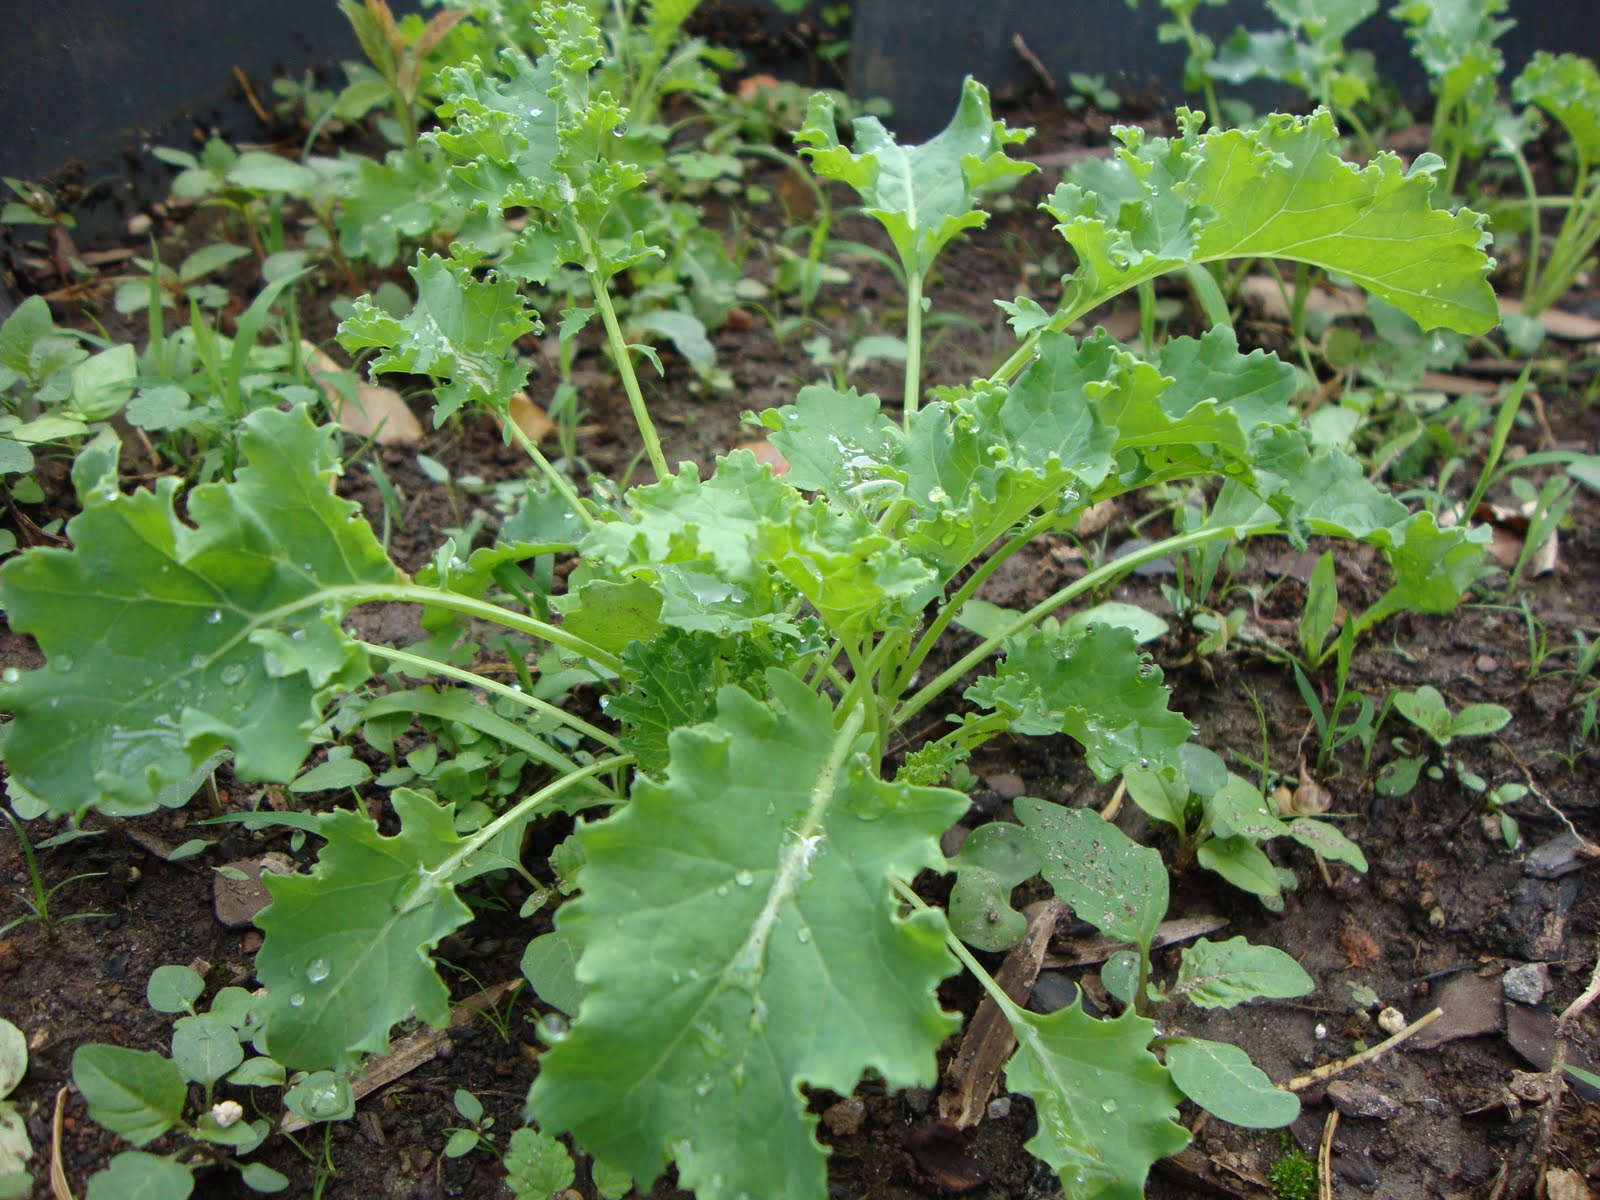
- Kale- this is a pretty long lasting plant. My kale has been a champ so far- in the picture below, the kale is just 3 weeks old! Also, you can plant kale in the spring and the fall for two growing seasons (it actually tastes better when affected by frost!)
 What is that in with the Kale, you ask? Baby basil and cilantro plants. I talked above about how herbs can come back each year, well I didn't know that when I planted and planted the Kale in where I had my basil and cilantro last year. We left for a weekend and when we came back I had all these herbs in with the Kale! I guess I will be transplanting them elsewhere and see if they survive.
- Chard- the most robust of plants (meaning it's really, really hard for you to accidentally kill it :)- or so I'm told and I haven't killed ours yet! Swiss Chard is in the same family as beets and rhubarb. It can have a ton of uses like braised with meat, steamed in a salad, in soups or stews, and so much more.


- Lettuces- Red leaf, Butter lettuce, Spinach, Arugula, Romaine- there are so many varieties that grow really well in shaded areas. The only advice I have for lettuce is that you need to thin them at the base (that is pluck the lower leaves off) when the plant is young- especially after you plant them in a planter.
 The green lettuce in the front looks great, while the red-leaf lettuce in the background looks trampled. We had a bad storm and afterward I just thinned it out and it perked right back up :)

- Other plants that grow well in planters are: tomatoes, peppers (jalapeno, bell, cherry, banana), eggplant, beans (pole, green, etc.) and radishes
Planters, Supplies, and Where to Buy Them:
- Most of the planters you see pictured above were purchased from Big Lots or Walmart. I spent a total of $25 on all of my planters (2- 12" wide for $6 each, 1- 16" wide for $6, 2- 10" wide for $2.50 each, 2- 6" wide for only $1 each!). Make sure to buy planters that have holes in the bottom so the soil can drain well. Sometimes you can buy big ones, like for tomatoes, that don't come with holes- but you can easily drill them in at the bottom. Also, don't be afraid to recycle some old stuff. We turned this dumpster (that was extra behind our house when we moved in) into a planter.
 The top half is also now our compost bin (more on that in another post ;). You can even use old Tupperware containers if you like. Seriously- doesn't have to be fancy (says the girl who planted Kale in half an old trash can...we cleaned it out really well first :).
 - Compost- If you don't make your own, you can usually buy some from a local farmer and sometimes Whole Foods. Mix half compost in with the dirt whether planting from seed or transplanting.
- Fertilizer- I know this is gross, but sometimes local farms give away their extra horse or cow manure! We actually get our fertilizer from a seller at our Farmer's Market (he uses chicken manure because he raises them). If you don't like the thought of going to buy that and loading up your truck with it for the ride home, then Lowe's and Home Depot sometimes will have organic fertilizer choices. They are usually pretty helpful there with gardening questions, too! We mix a little fertilizer down with the compost and dirt below the plant. Then another thin layer of dirt, then plant, and then sprinkle the fertilizer around the topsoil making sure to not put it touching the plant. I'm not sure why, but the wise old gardener at the Farmer's Market told me to not touch the fertilizer directly to the plant, so I don't- have no reason other than that!
- Finally, water- which should be free! Plants need a lot more water during the first weeks than they do when they have matured.

Happy Back Porch Gardening!
Eryn
Thanks for the tips! :)
ReplyDeleteI tried growing some herbs in a planter hanging off my deck last summer, but it didn't work very well. Between the terrible weather (way too much rain and not enough sun) and using seeds instead of pregrown plants, meant that they didn't produce anything worthwhile. Ironically, I planted some oregano that came in a container from my grocery store and it turned out very well! I might have to try doing that this year with a wider variety of herbs...